Use bwCloud SCOPE
For this tutorial the First steps are required.
Initial access to instances is only possible via SSH. This public SSH key is automatically imported into the Linux system when a virtual machine is created. You can then log in to the system from outside via SSH. Instances in the bwCloud can be controlled automatically. You can prepare your instance for this with the following steps.
Please note: Do not store any personal and/or sensitive data or information in the bwCloud. We can't provide a sufficient level of protection in order to meet the requirements of ZENDAS regarding data protection etc.
Step 3: Create SSH key pair[ssh_key_gen]
The process for creating an SSH key pair (public and secret SSH key) is described below.
- For Windows users using PuTTYgen.
- For Linux and Mac users.
1. Windows users using PuTTYgen
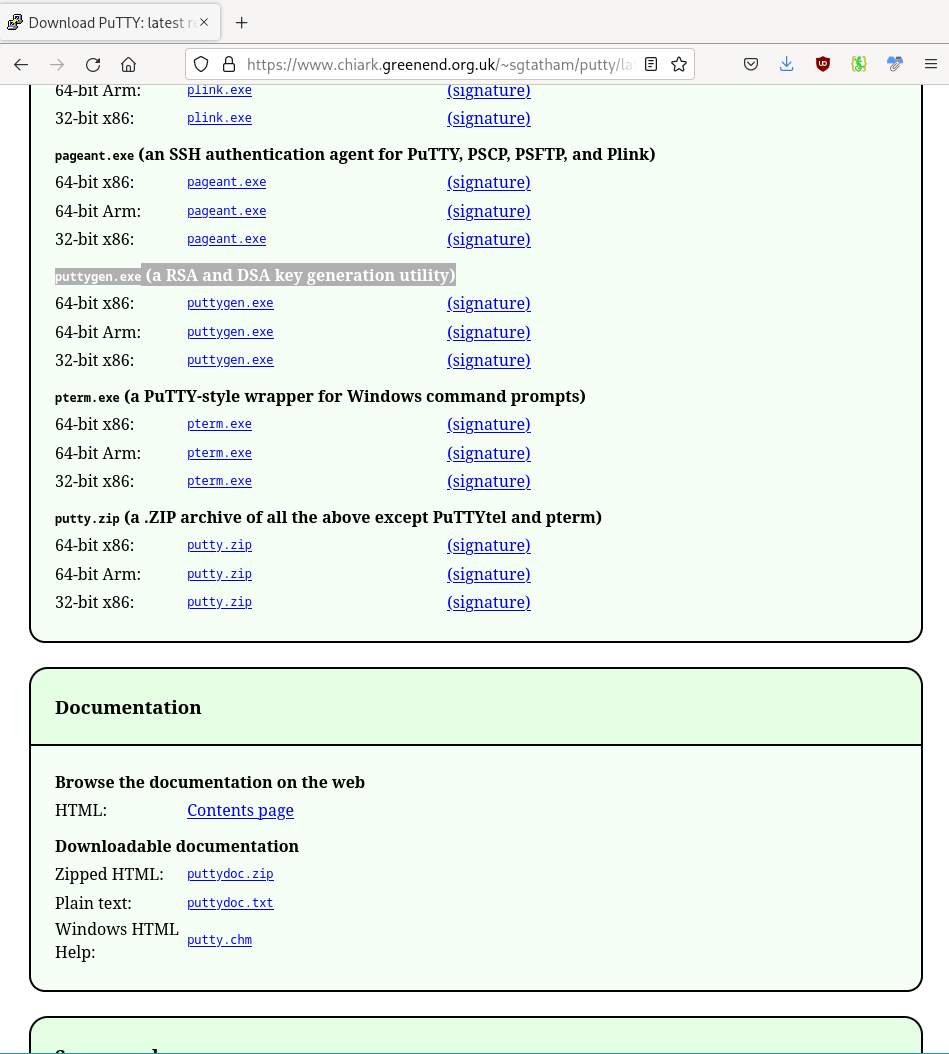
PuTTYgen must be installed first. This program is used to generate the SSH key pair.
PuTTYgen installation
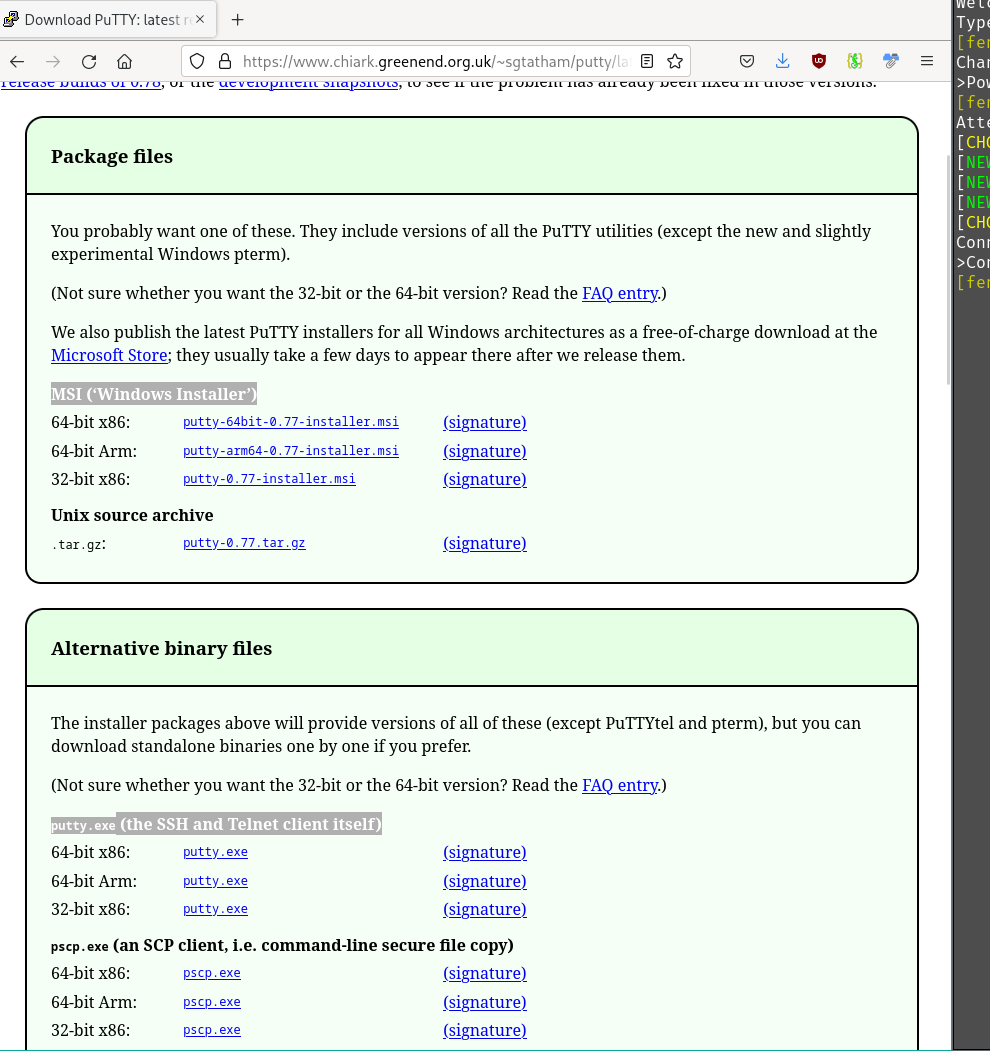
Download the program puttygen.exe.
- For example, go to the page putty.org.
- On the website, click on Download PuTTY.
- Search on the page that opens afterwards for the source 'puttygen.exe (a RSA and DSA key generation utility)'.
- Save the appropriate program for your system (64-bit x86 or 64-bit x86).
- Start the program/ file putty.exe directly.
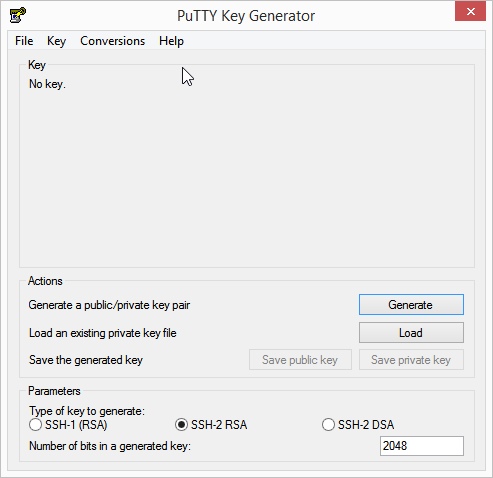
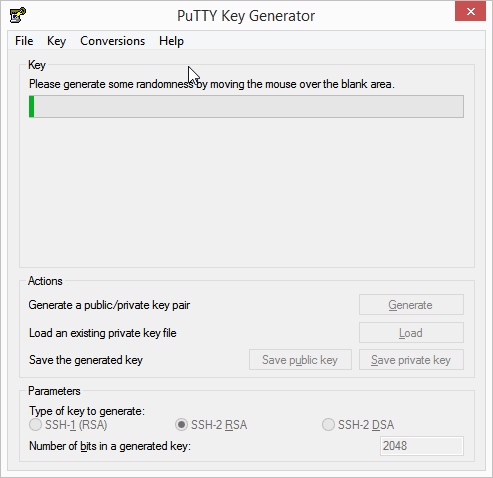
SSH-Key generating
Create an SSH key pair and put it in the right format.
- Choose the following settings: the type
RSA , the bit strength at least4096 and a password for the key. - Click the Generate button to the right of the Generate a public/private key pair label.
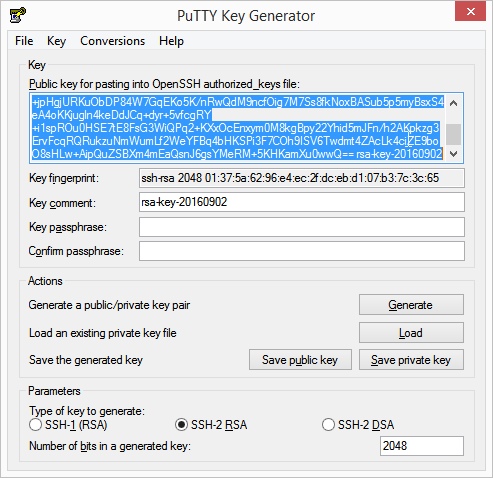
- Move the mouse over the screen with irregular movements to generate enough entropy for key generation. When the key generation is completed successfully, the public key is displayed in a text box.
- Open a simple text editor (e.g. Notepad) and copy the generated public key from the text field into the editor.
- Change the format of the key to a one-liner.
ssh-rsa AAAAB3N...SMQQ== mail@example.com - Save the public key in a directory.
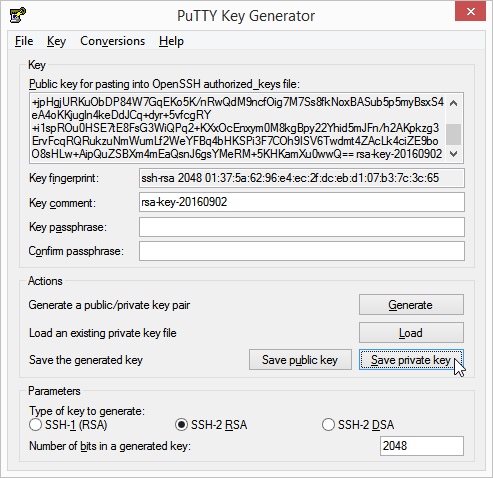
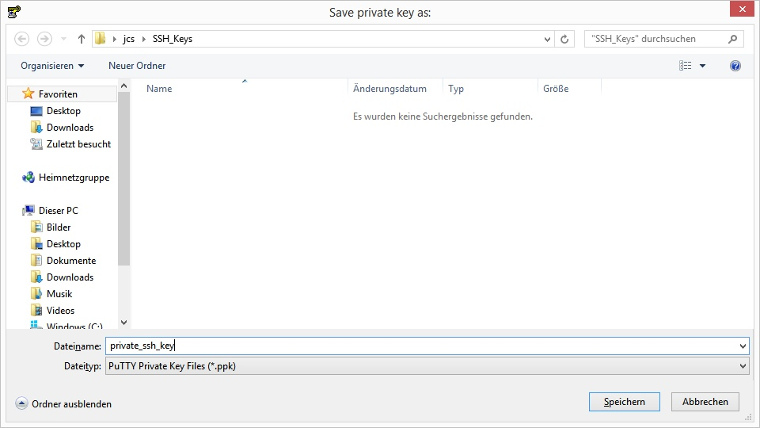
- Save the private key in the same directory as the public key before. To do this, click the Save private key button.
2. Linux and Mac users
Execute the following command in the terminal.
-
A key pair is generated under the name myKey.
ssh-keygen \
    -t rsa \
    -b 4096 \
    -f ~/.ssh/myKey
Enter a secure password in the input field. Keep your password safe. You cannot use the key pair without it. The public key has the file extension.pub . -
Make sure that other users cannot access your private key.
chmod 600 ~/.ssh/myKey
Step 4: SSH key registration[ssh_key]
In the following steps, you register your personal public SSH key in the bwCloud.
- Log into the bwCloud as described in First steps: Schritt 2.
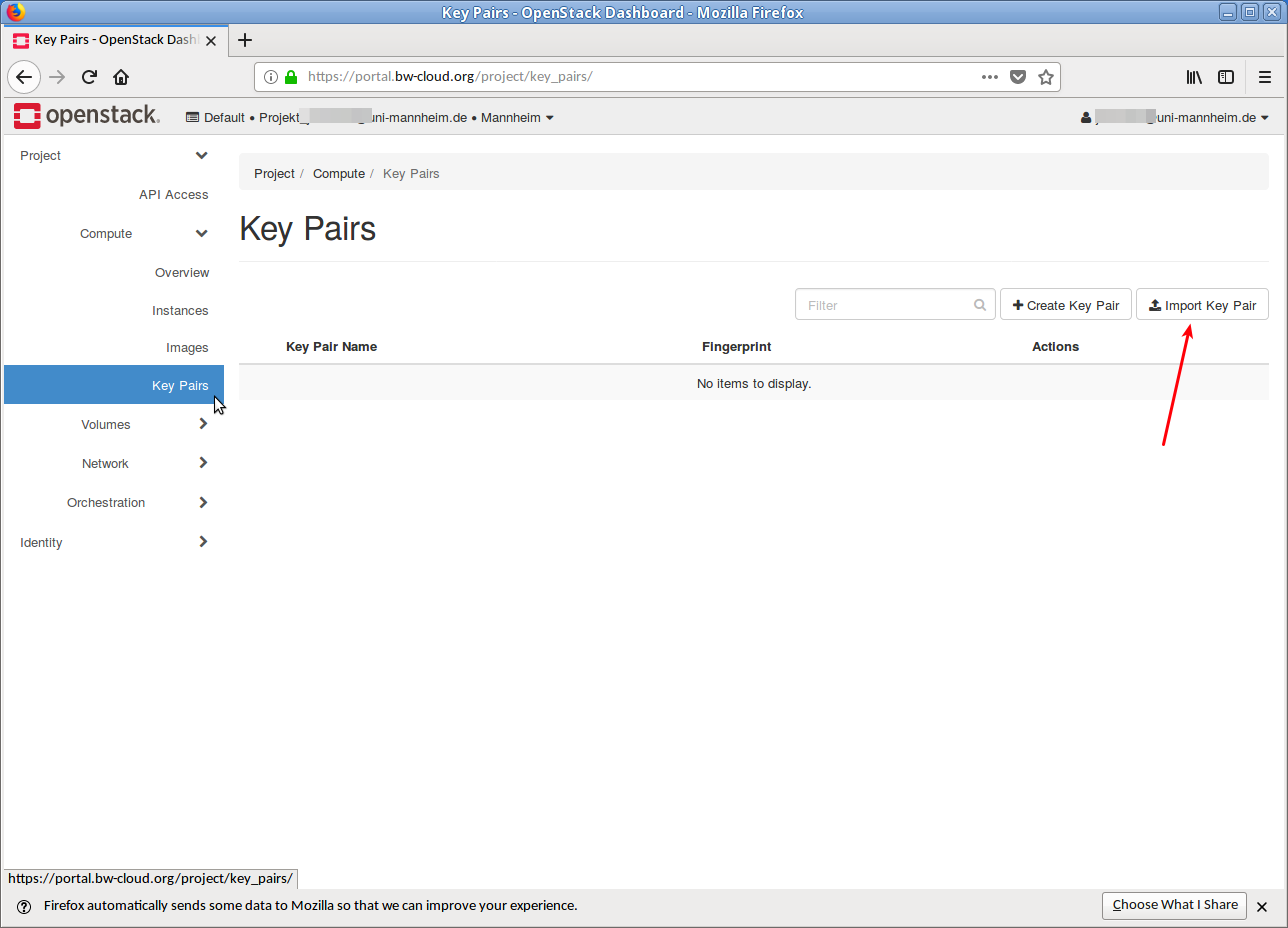
- Click below Project → Compute on Key pairs. You will see an overview of the key pairs you have (already) imported.
- Click on the button Import key pair in the upper right corner. A dialog opens.
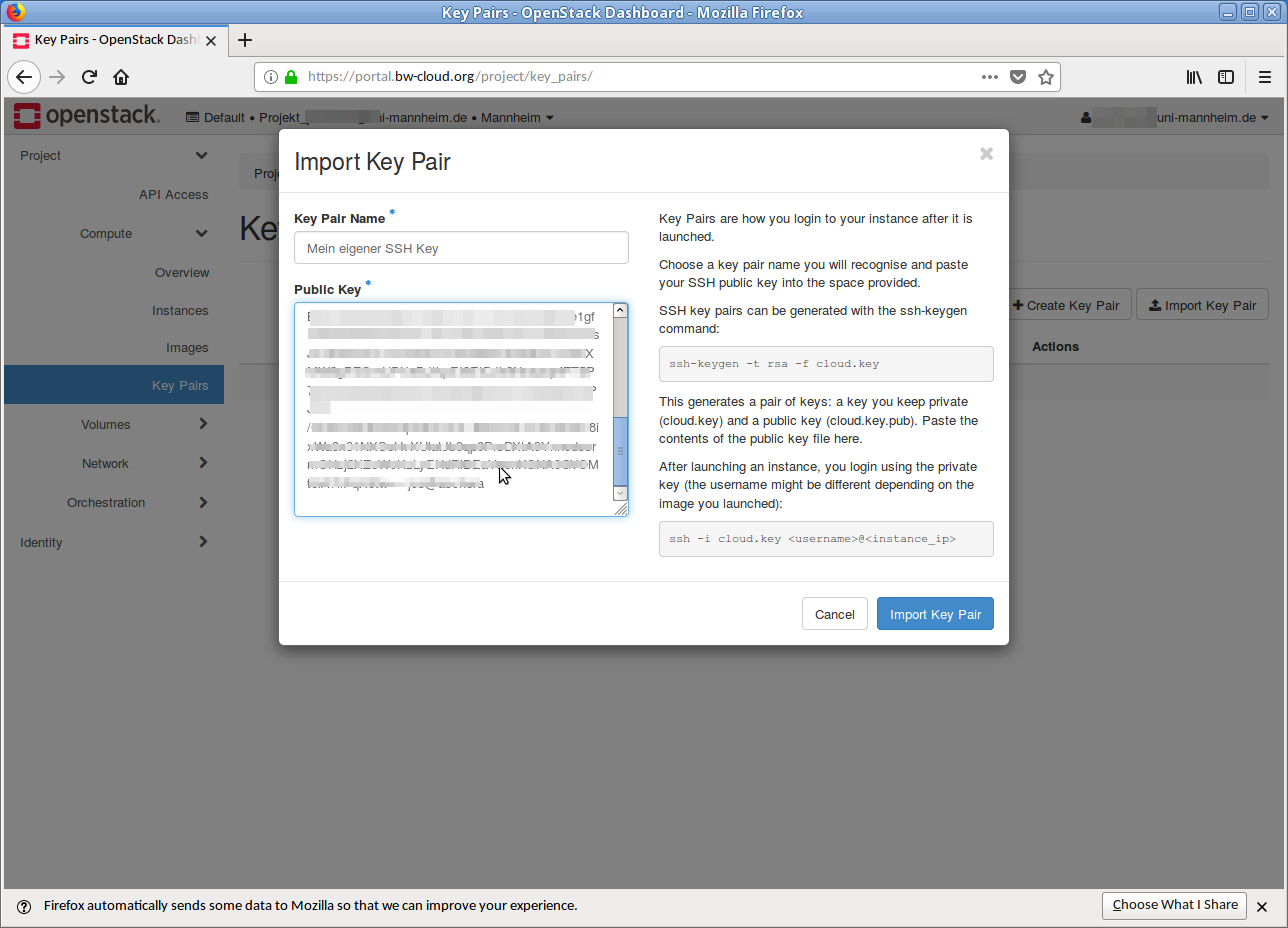
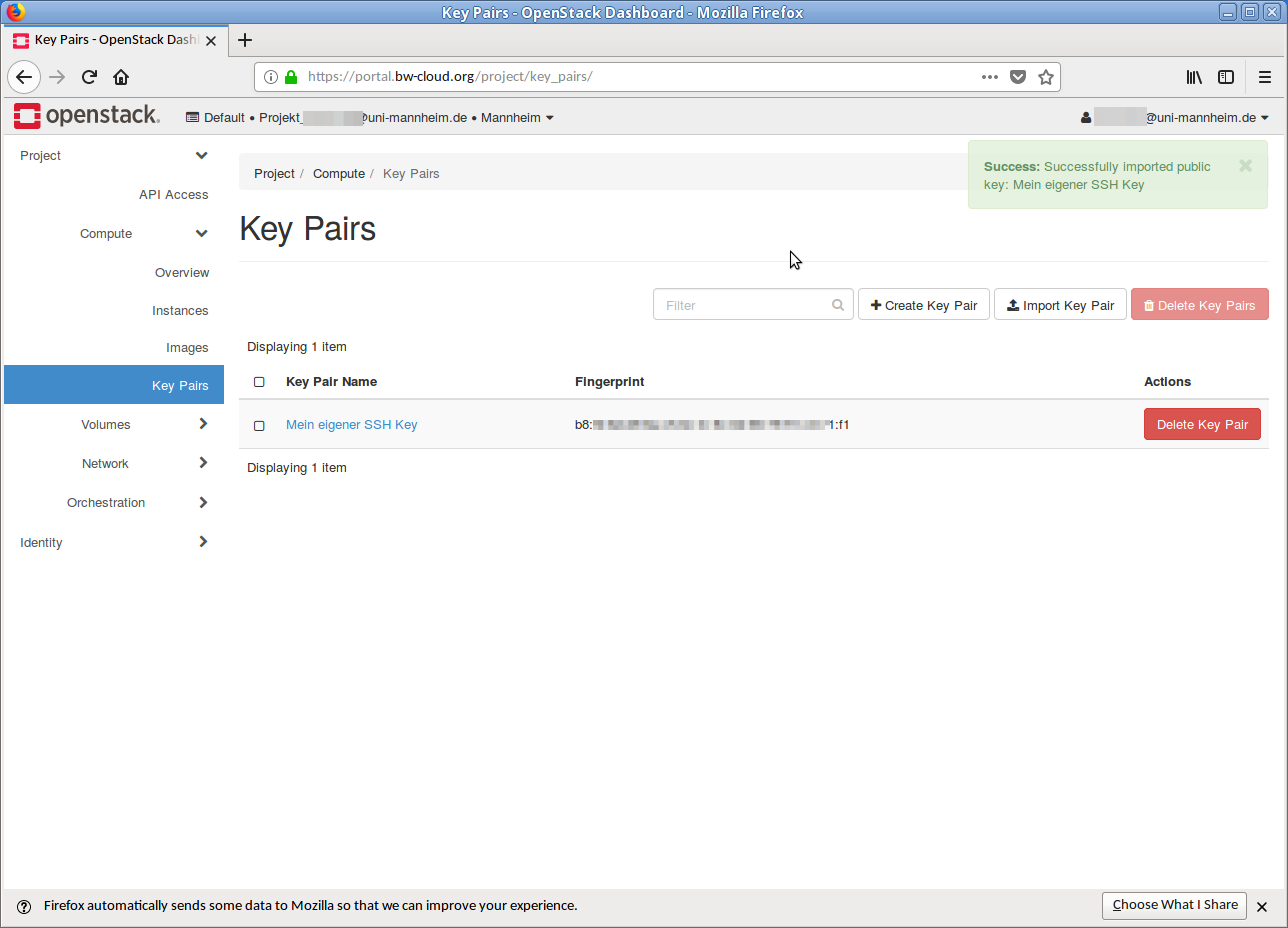
- Name your SSH key with a unique name and copy the public SSH key into the text field below. Then click on the button Import key pair. If the process was successful, you will get an overview with the imported SSH key(s).

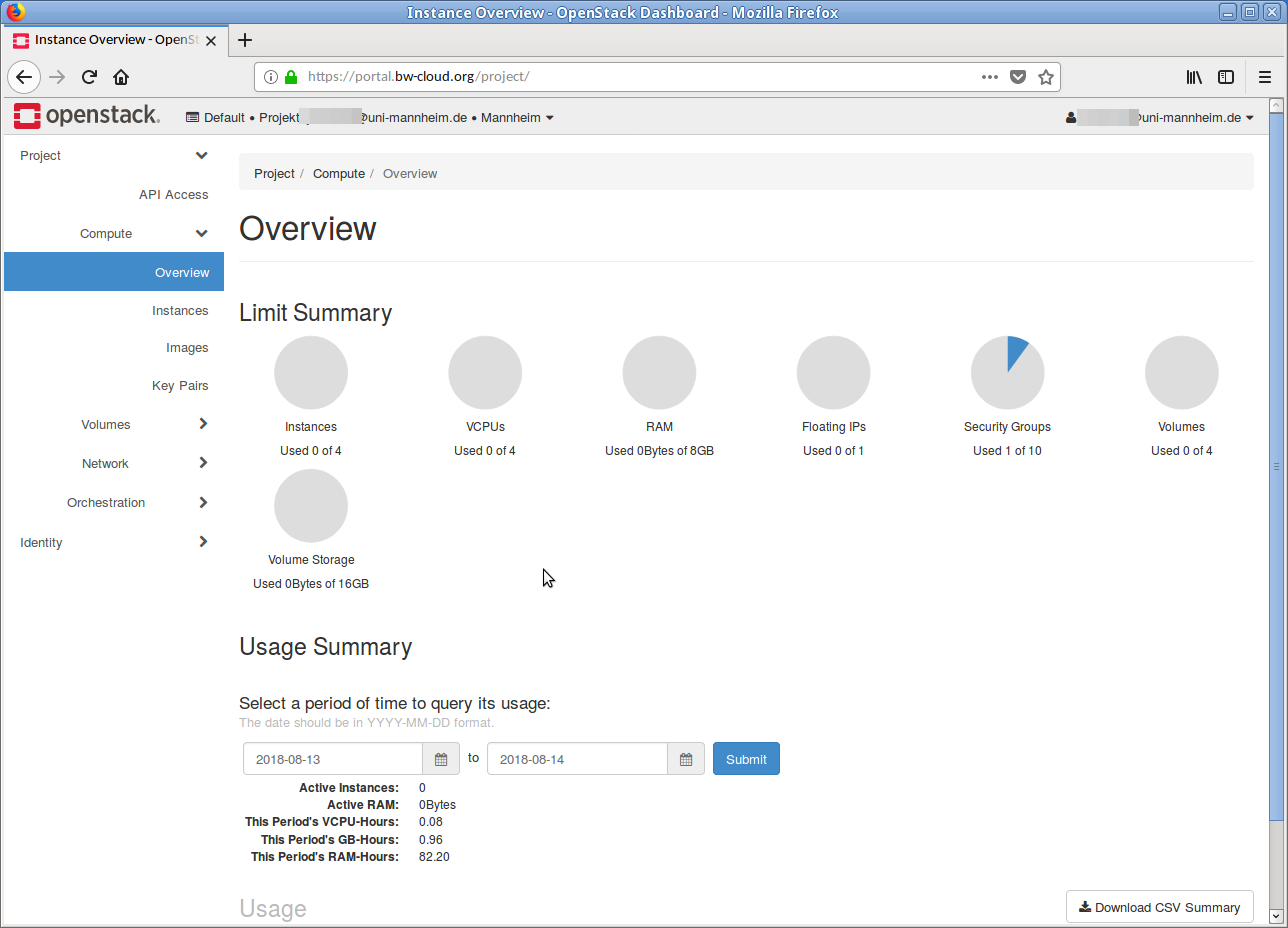
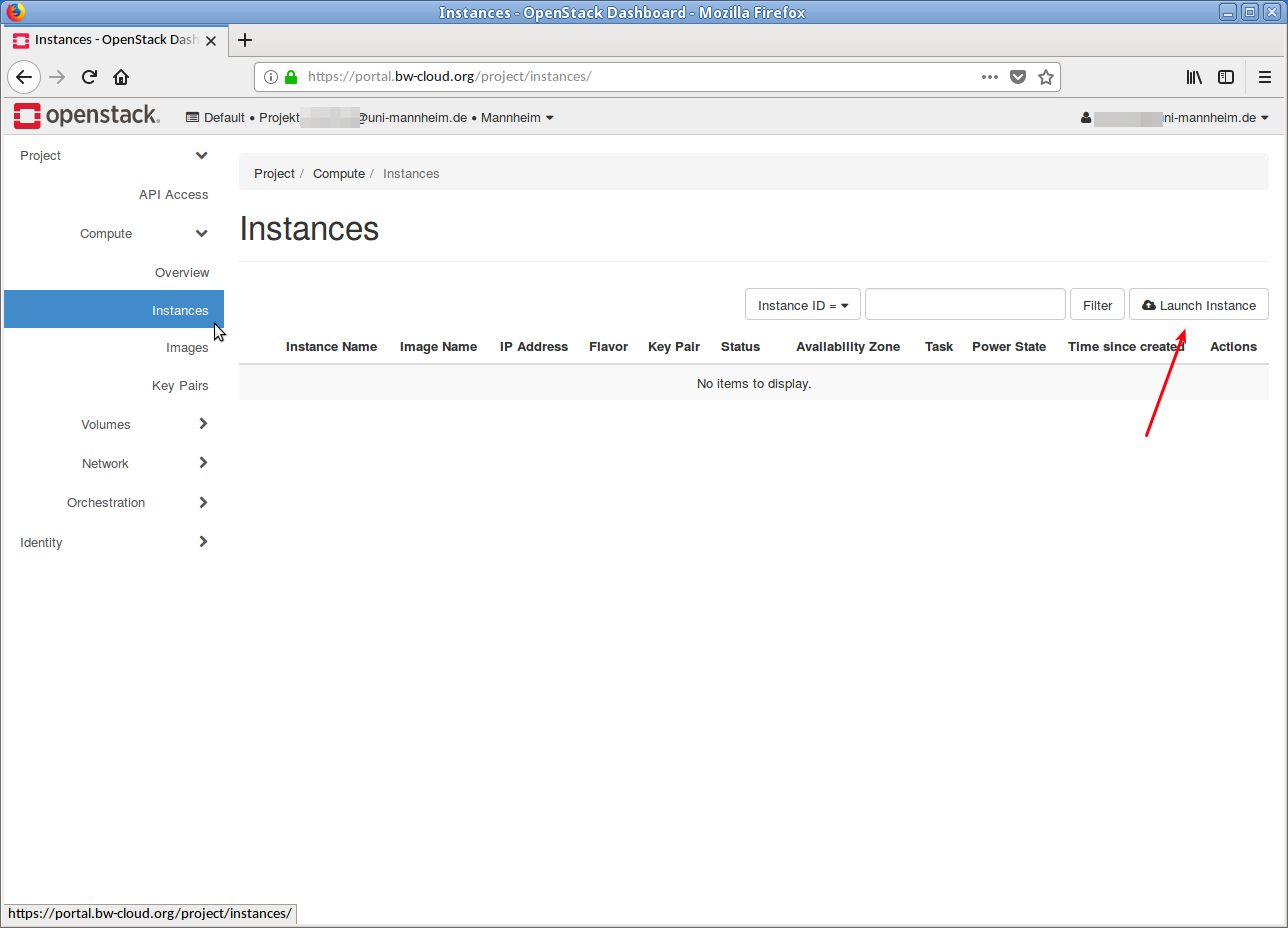
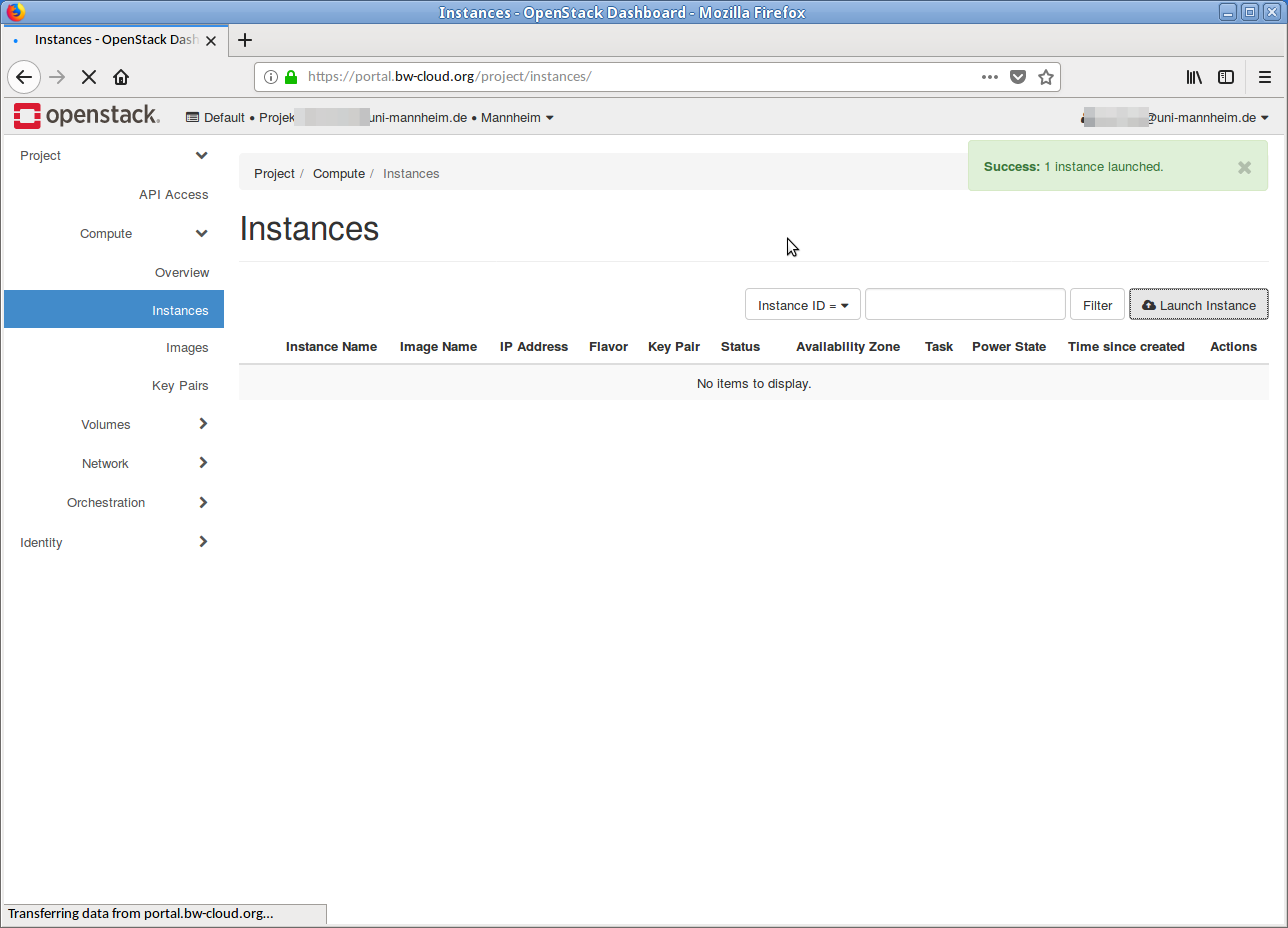
Step 5: Starting an instance[launch_instance]
-
Click on Instances in the left menu.
On the new page click on the button Launch Instance.
A dialog opens that guides you through the process step-by-step.
-
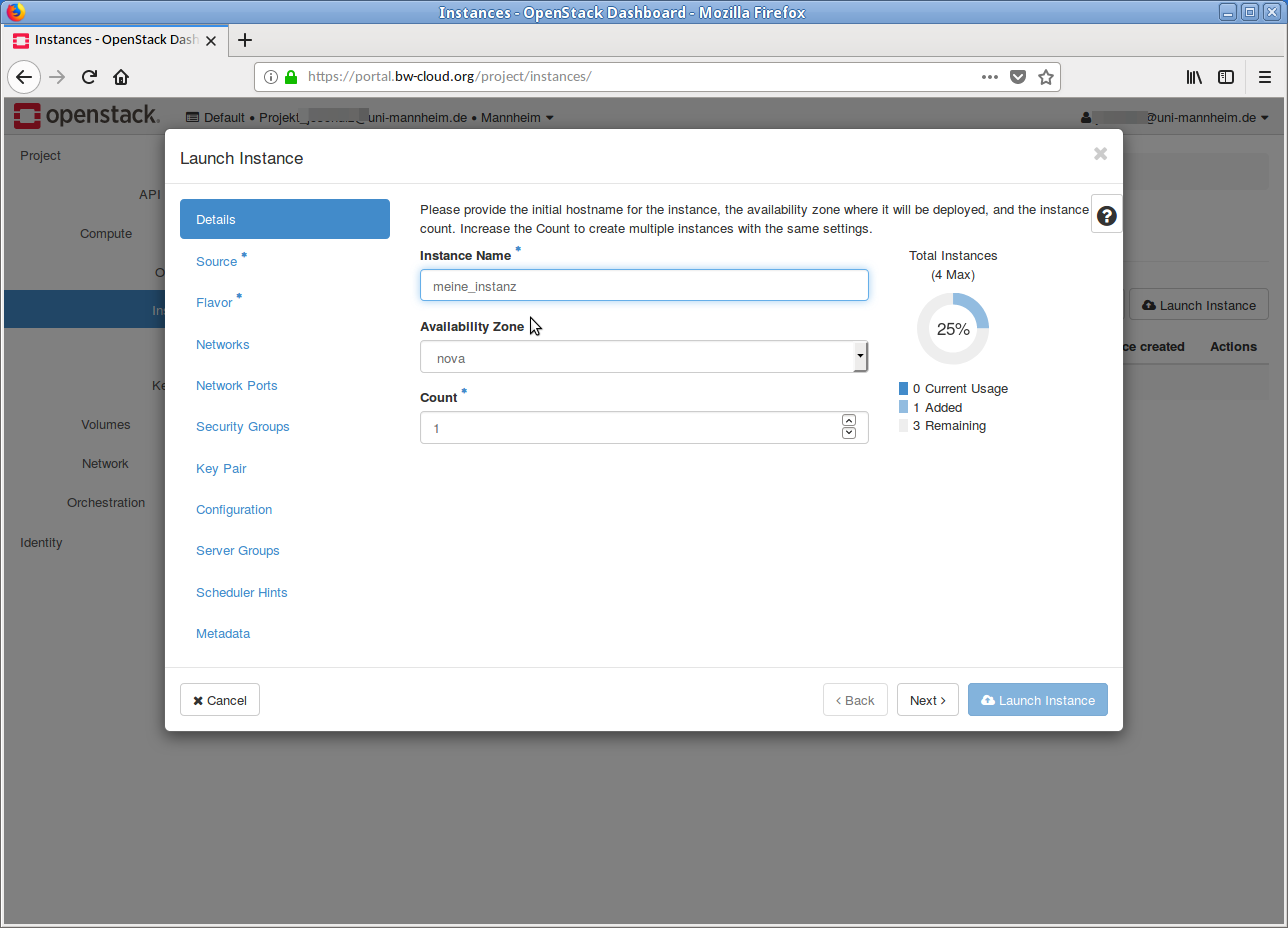
First, enter a meaningful Name for the instance, e. g.
myVM01 . Then click on the Next button below. -
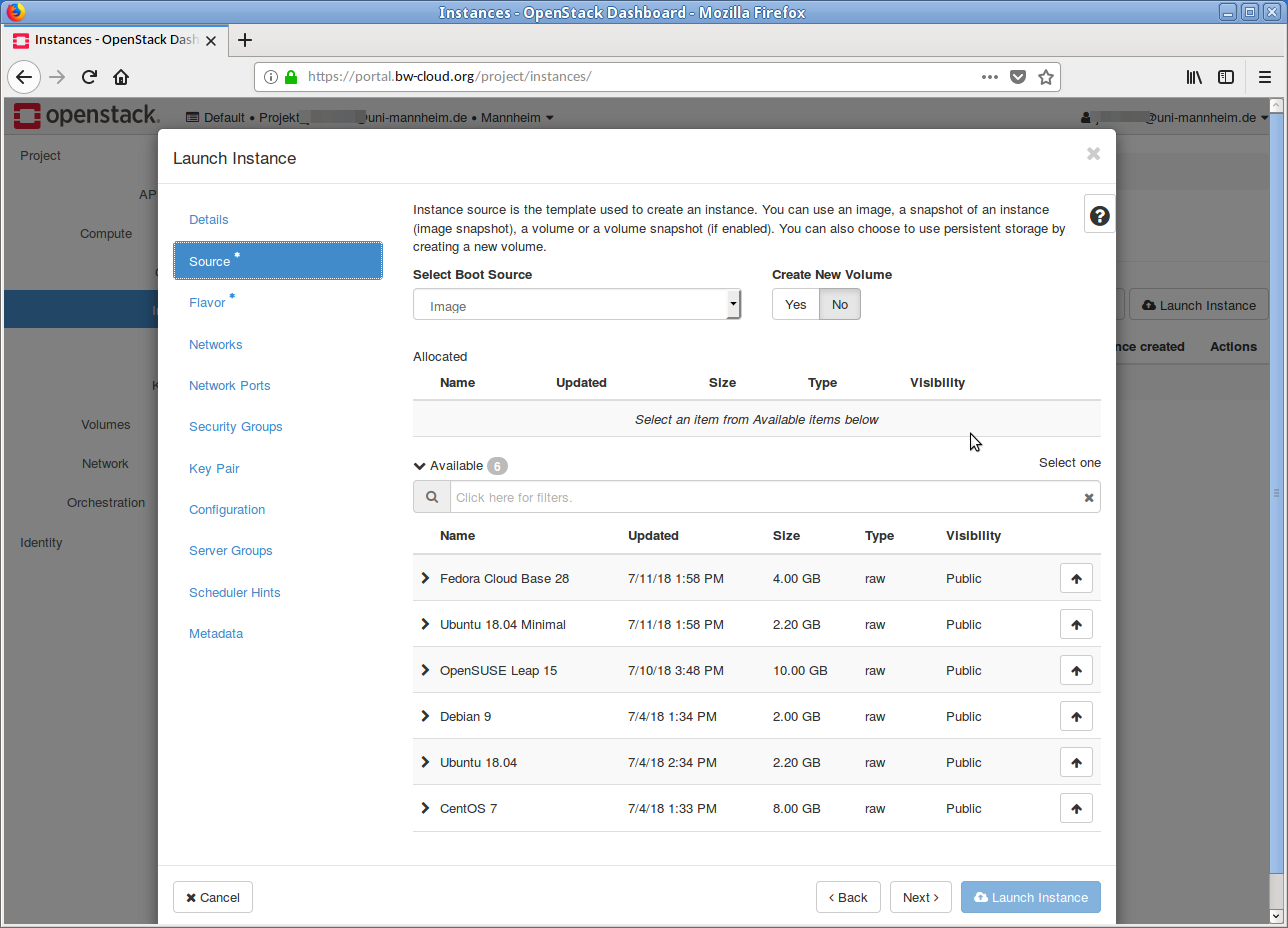
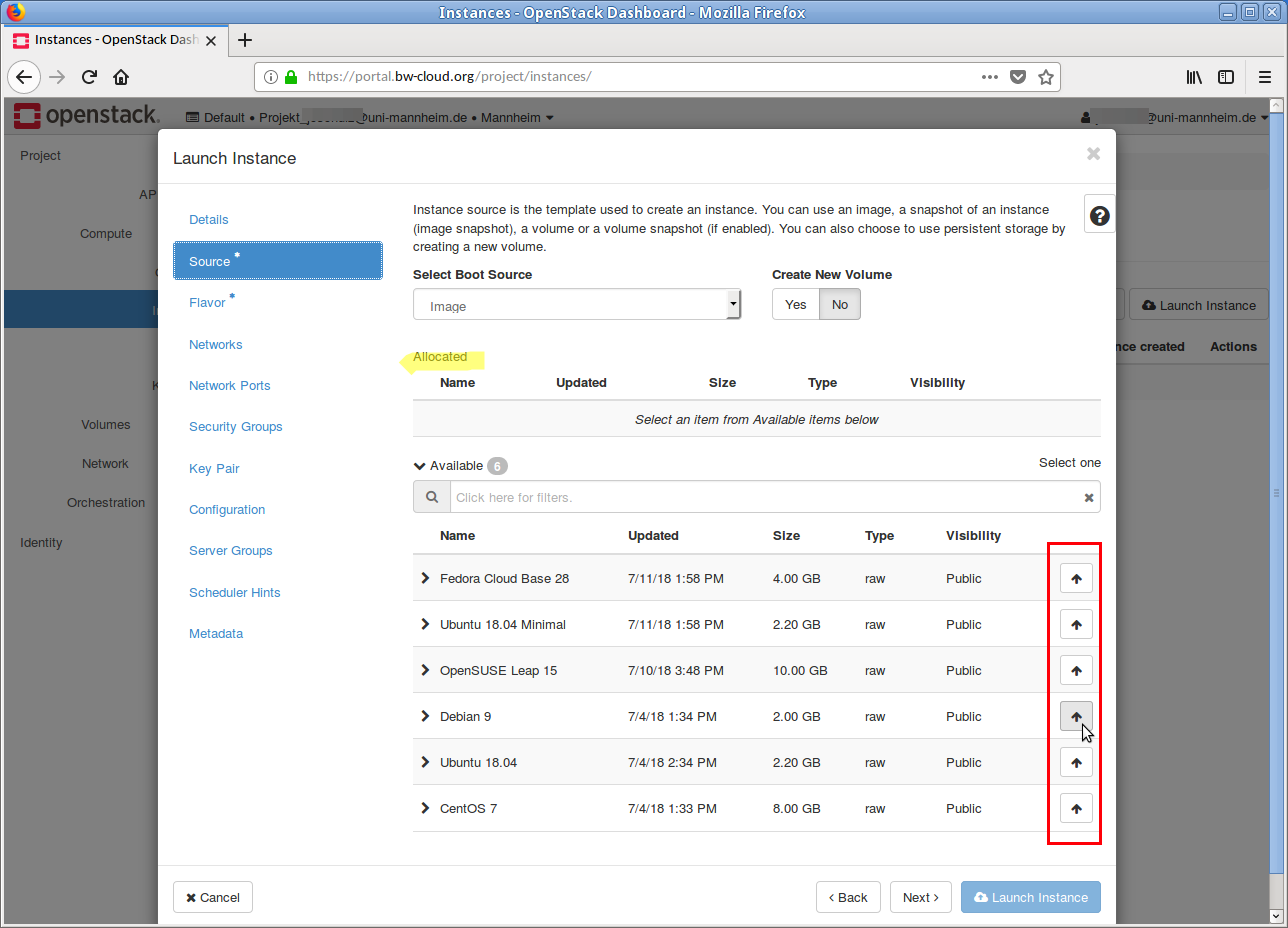
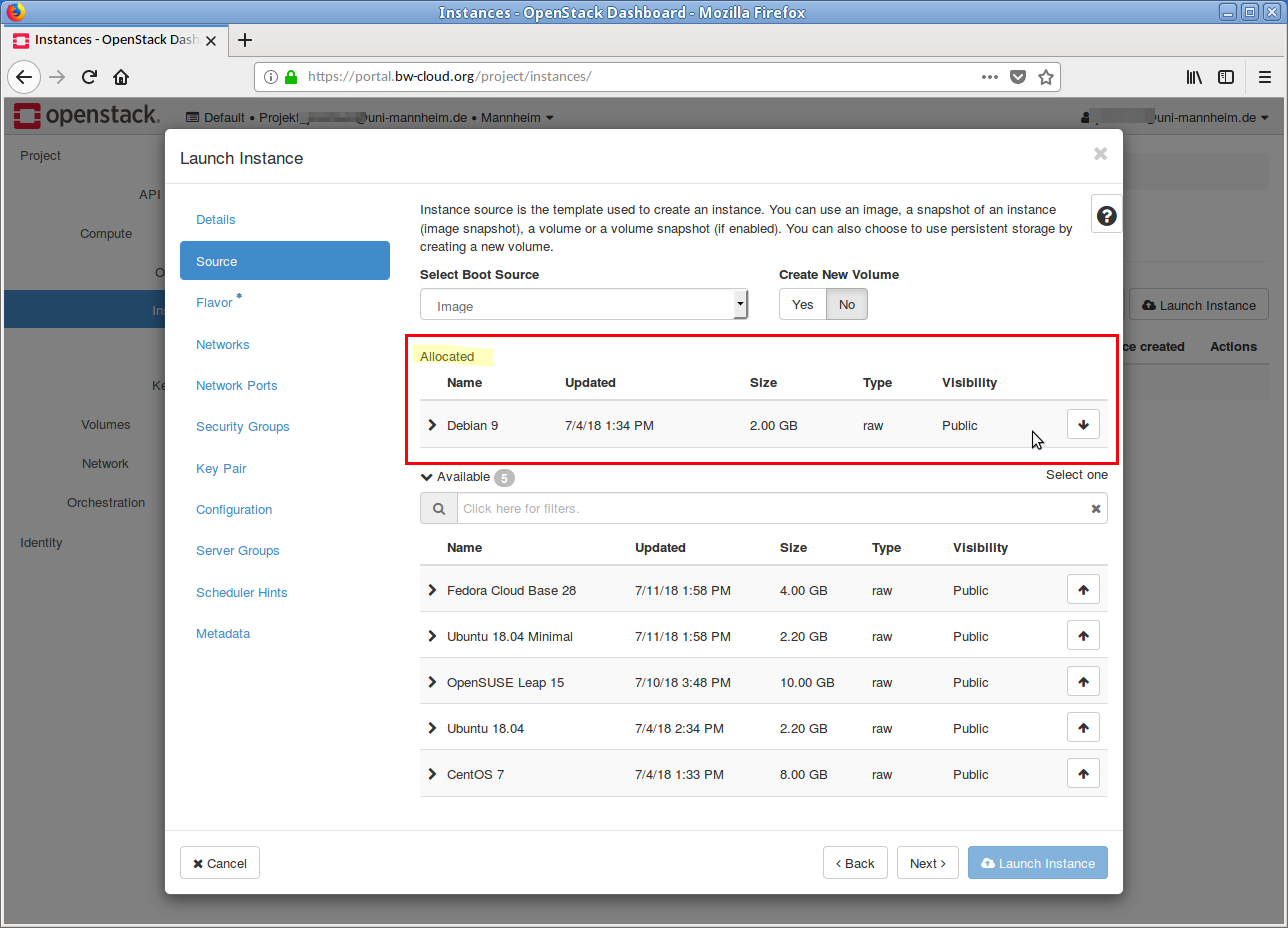
Now select a template on which your instance should be based, e. g.
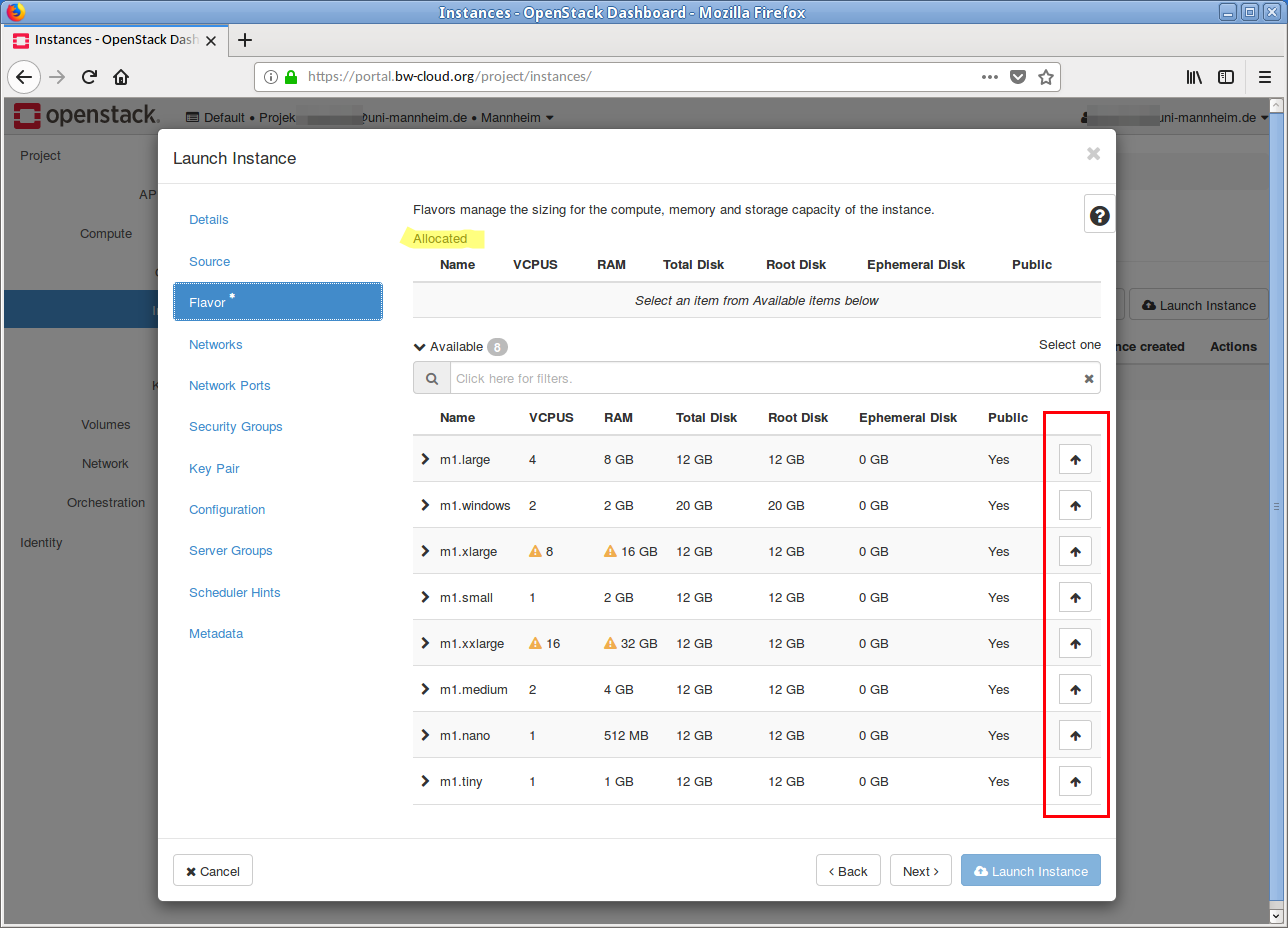
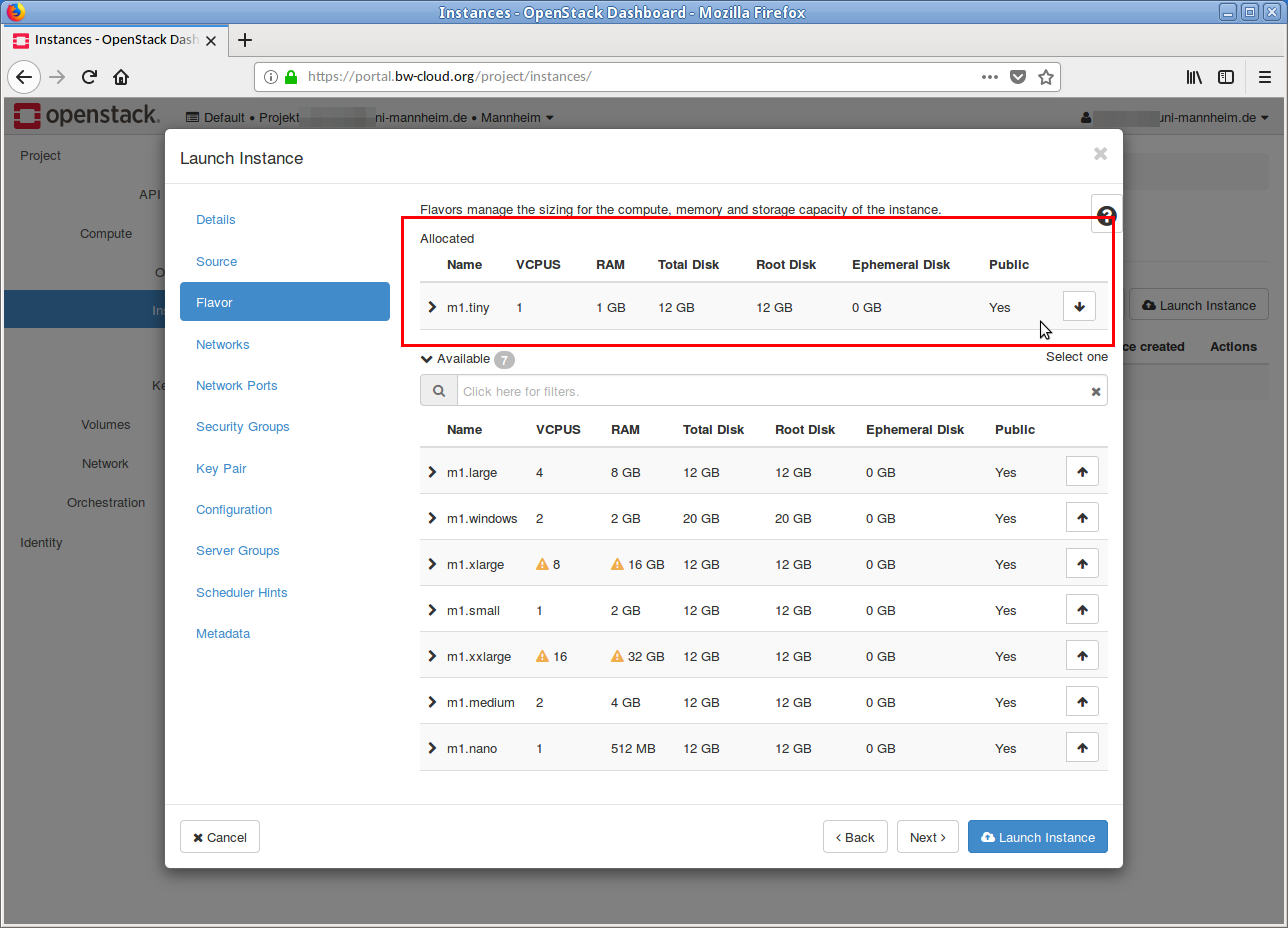
Debian X . This is done by clicking on the Up arrow. In the Allocated area, the selected image is displayed. If you want to discard this selection, click on the Down Arrow in the line. - In the next step the flavor must be selected. If your current quota is too low for a flavor, this is indicated by a yellow warning symbol.
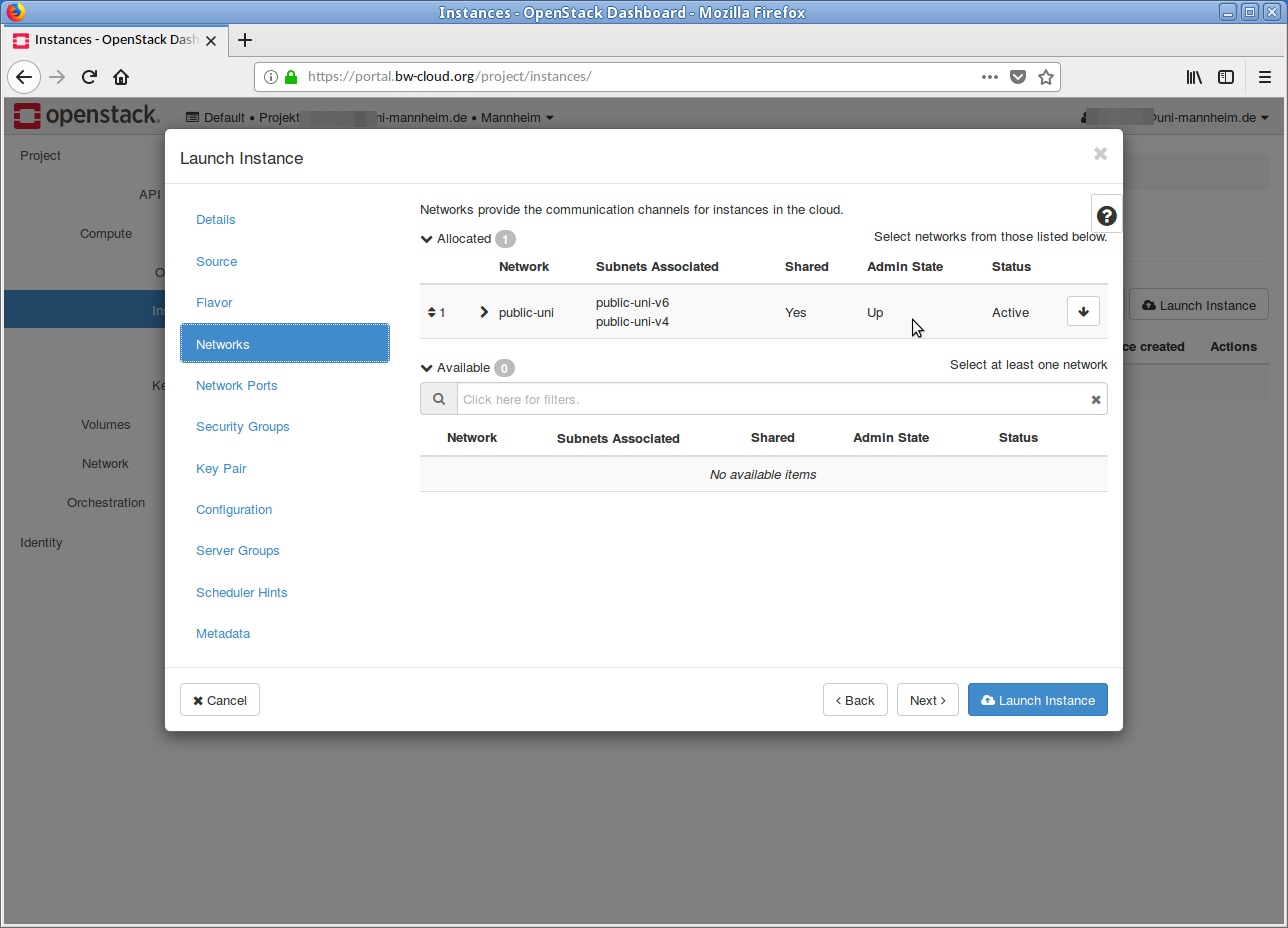
- Next, select the network. In most cases you don't need to change nothing here, because the default setting usually fits.
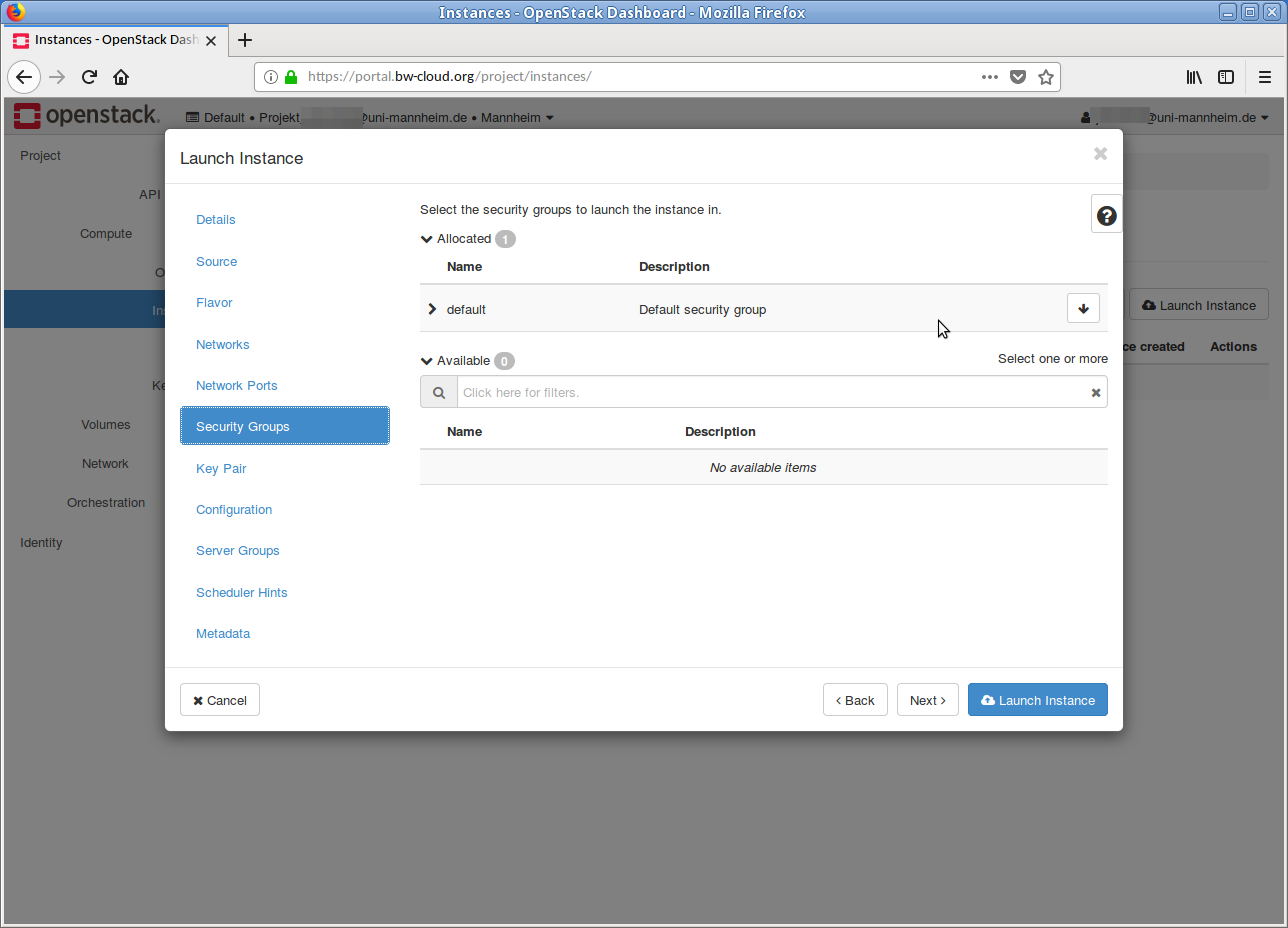
- As far as the Security Group is concerned, you generally do not need to change anything at this point. Adjustments can be made at a later date.
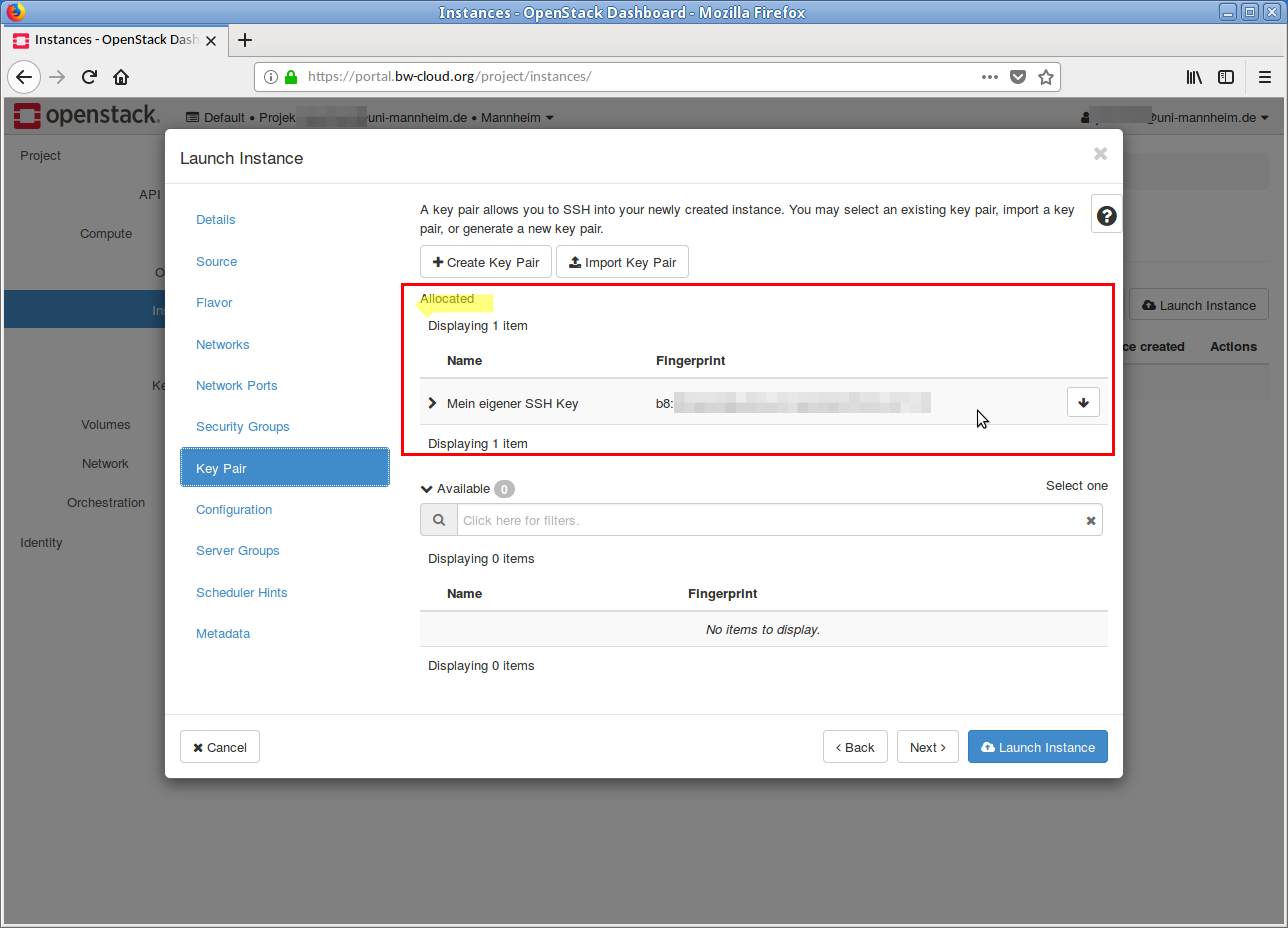
- In the next step you select the public SSH key that is to be integrated into the instance. This step is very important, because without a public SSH key no access to the running instance is possible.
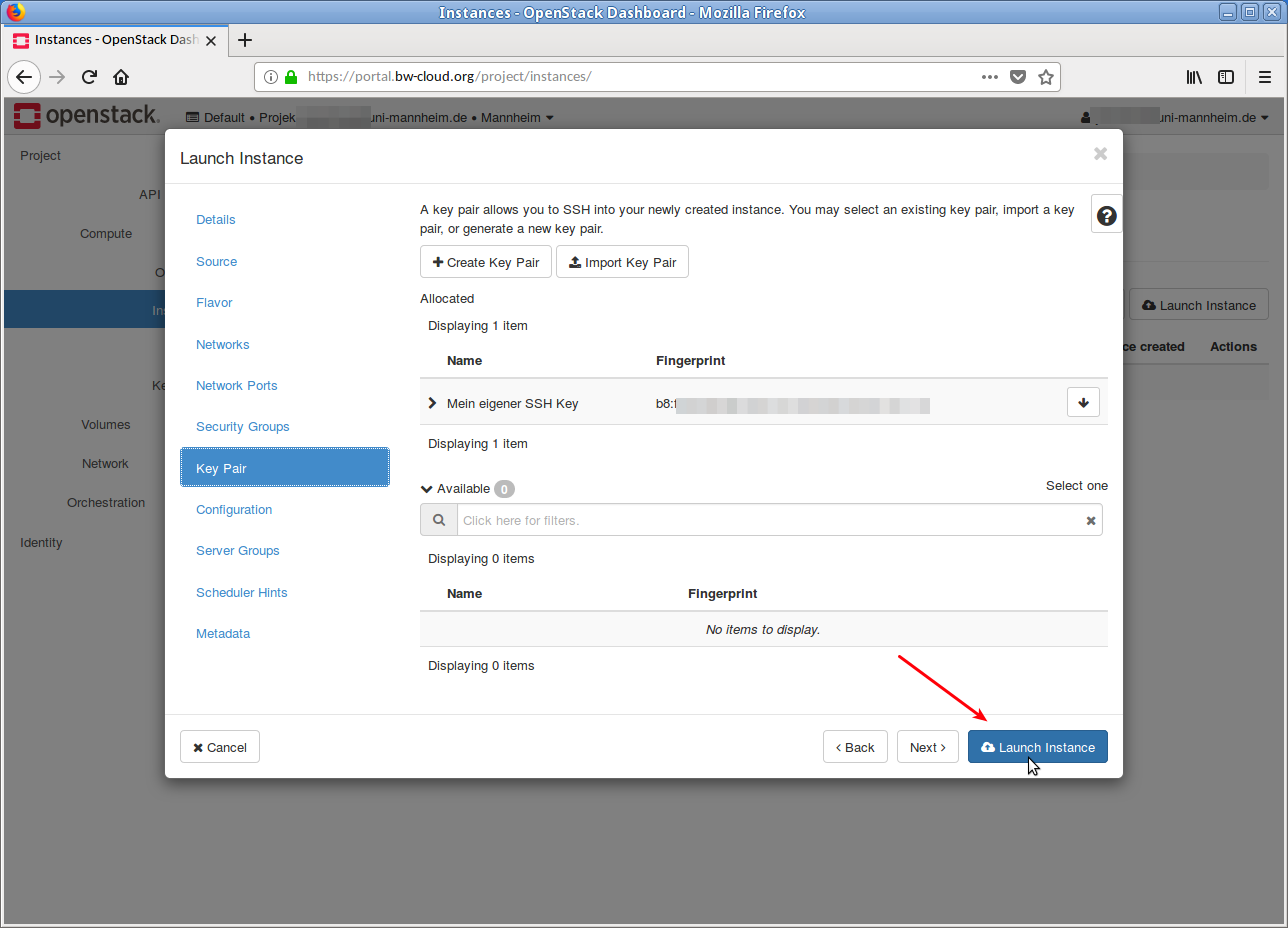
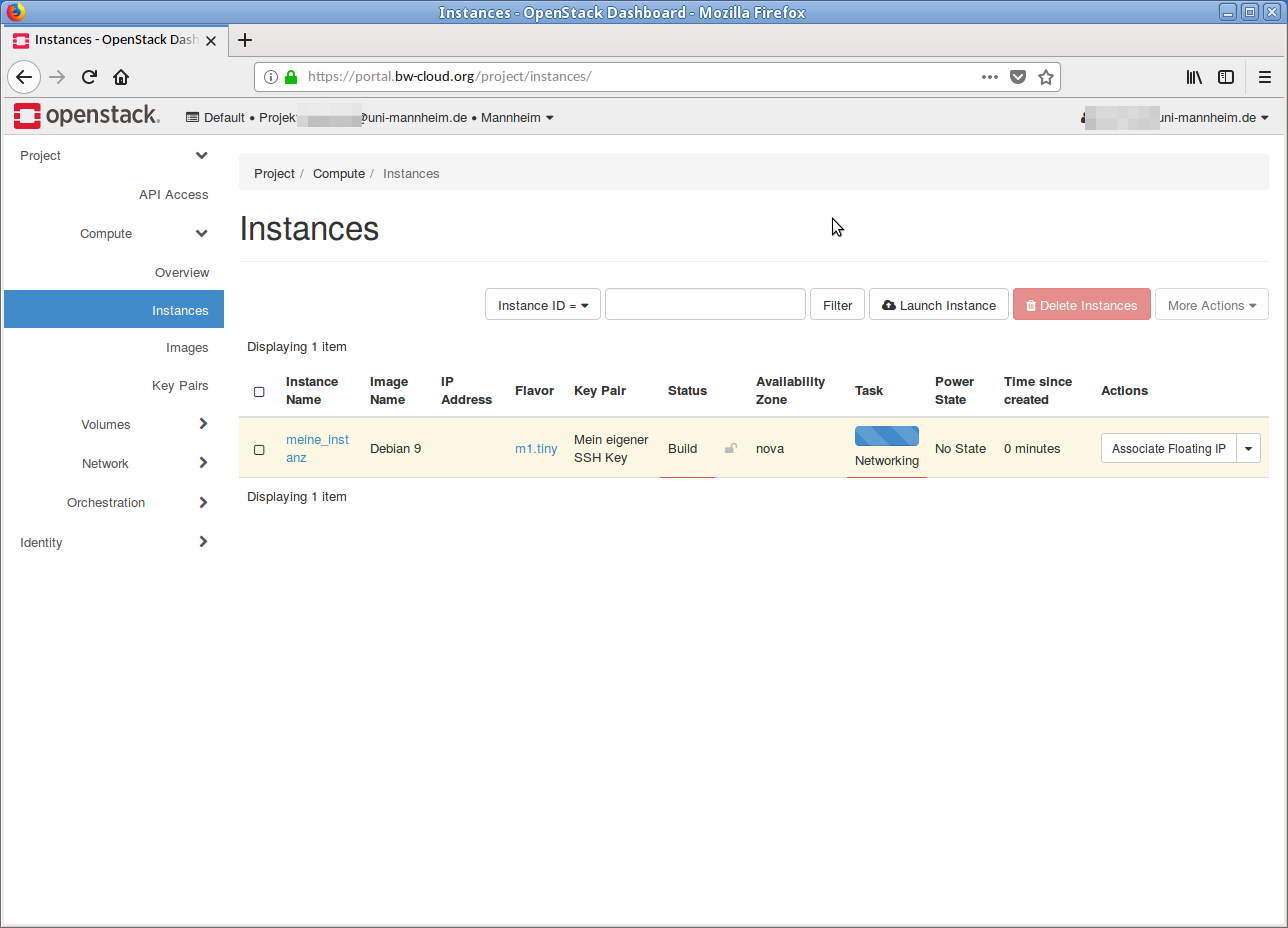
- Now click on the button Launch Instance. The instance is started.
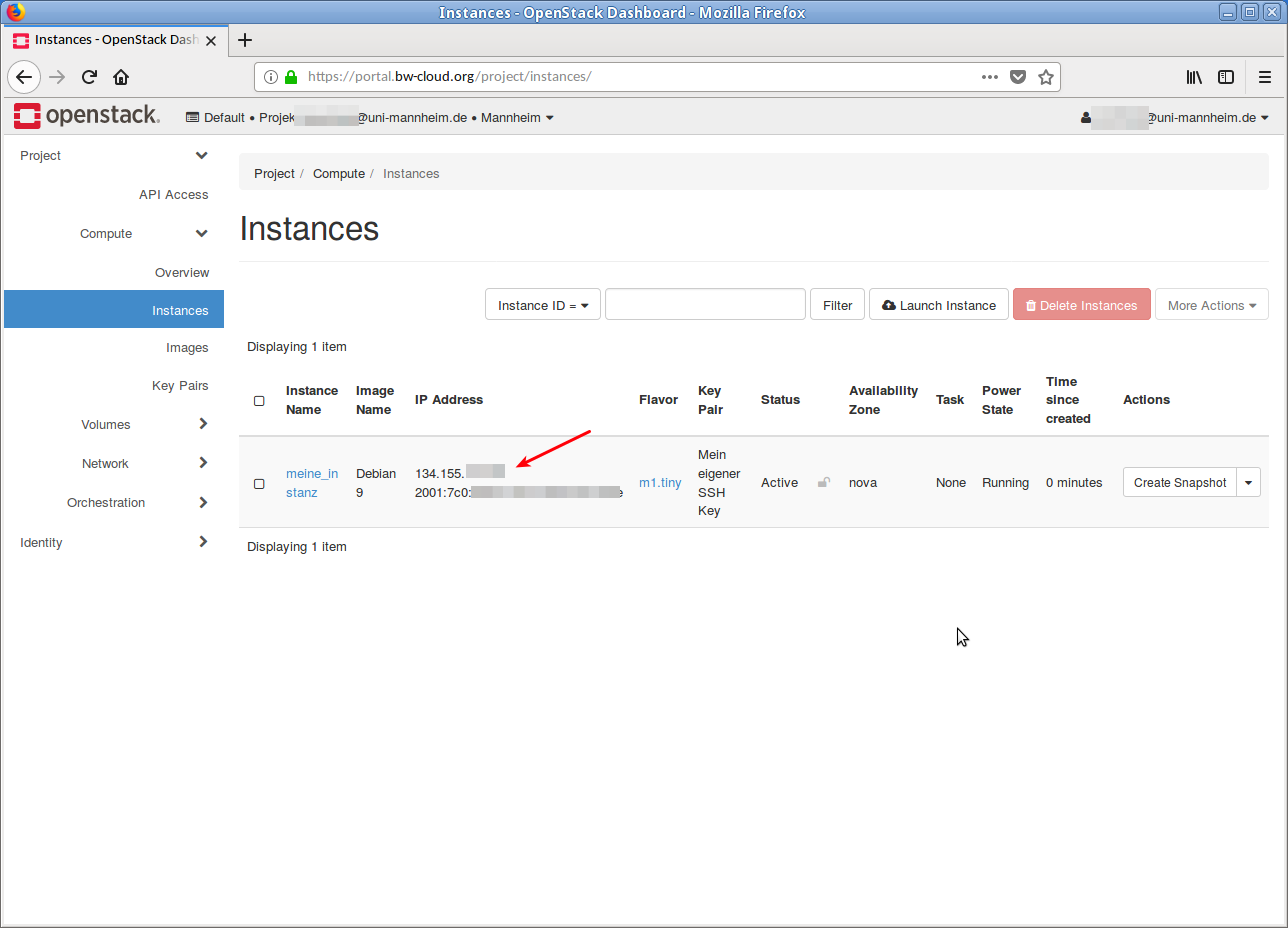
- When the instance is completely started and set up, the IP addresse is displayed in the overview. Under this IP address is the instance reachable.
You can now connect to the instance via SSH. The corresponding SSH usernames can be found in this list.

Step 6: Setting up SSH client[ssh_client]
These instructions describe the preparation for accessing the virtual machines using the previously created public and private SSH keys.
- For Windows users using PuTTY.
- For Linux and Mac users.
1. Windows user via PuTTY
PuTTY installation
Download the PuTTY program. There are two ways to do this.
- Go to the central page putty.org, for example, and click on the Download PuTTY link there.
- The page that then opens refers to the sources. Option Source 'MSI (Windows Installer)':
- Save the appropriate installer for your system (64-bit x86 or 64-bit x86).
- Start the installation process.
- Start the PuTTY program.
- Save the appropriate installer for your system (64-bit x86 or 64-bit x86).
- Start the program/ file putty.exe directly.
PuTTY setup
- Start PuTTY.
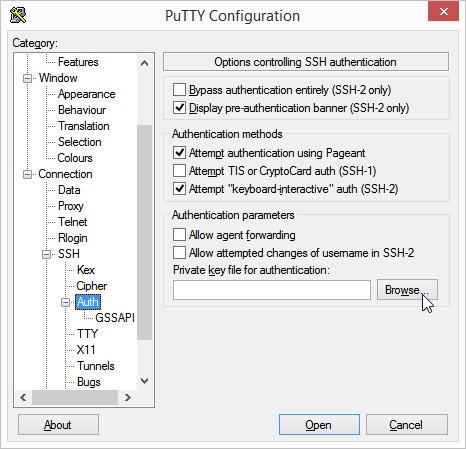
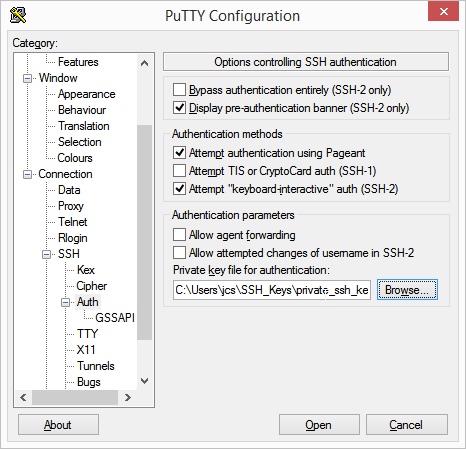
- Click on the Connection → SSH → Auth items in the left menu tree.
- Now click on the Browser button below the text Private key file for authentication. Select now the file with your private SSH key.
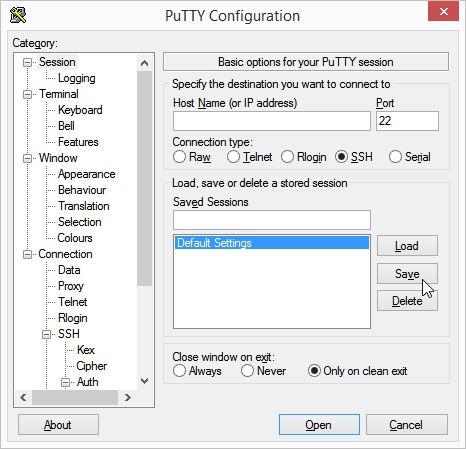
- If you do not want to repeat this process every time, we recommend saving the current PuTTY settings as a profile. To do this, click on the topmost item Session in the menu tree on the left.
- Now name the current settings (and session) either with your own name and/or click on the Save button.
- Now restart PuTTY. The previously selected secret SSH key is selected again.

2. Linux and Mac users
-
Add the following content to your SSH configuration file
~/.ssh/config . Create the file if it does not yet exist.Host myVM01 HostName <IP> User debian IdentityFile ~/.ssh/myKeyReplace <IP> with the IP address of your instance.
Step 7: Establish SSH connection[ssh_connection]
You can now connect to the instance via SSH.
- For Windows users via PuTTY.
- For Linux and Mac users.
1. Windows users via PuTTY
- Open PuTTY. Enter the IP address of your instance.
- Click on Connect.
- A terminal window opens. You will see the (green) Debian prompt of the remote instance.
2. Linux and Mac users
-
Execute the following command.
ssh myVM01 - The (green) Debian prompt of the remote instance appears in the terminal window.
Step 8: Prepare instance via Ansible[use_auto_method]
To control and customize your default instance, you should use automated methods.
- Create an access token/application credential as defined in our FAQ. You will need this below for our Ansible template.
- Tried and tested methods for automation are listed in our Wiki. Use the Ansible template specified there. Follow the steps described there.
Step 9: Open a port for access[open_port]
By default, a new virtual machine in the bwCloud is initially only accessible from outside via SSH (Port 22). This is defined in the assigned security group, e.g. default. All other ports are closed, i. e. requests on these ports can't get through to the instance. Some information about security with open Ports is in the FAQ mentioned.
As soon as the rules of a security group change, these changes take effect for all associated instances. The virtual machines therefore do not have to be rebooted.
Example:
- A Web server needs to be accessible via HTTPS. The corresponding port (Port 443) in the Security Group must be opened.
The step-by-step instructions explain in detail how to open a port using the Dashboards.
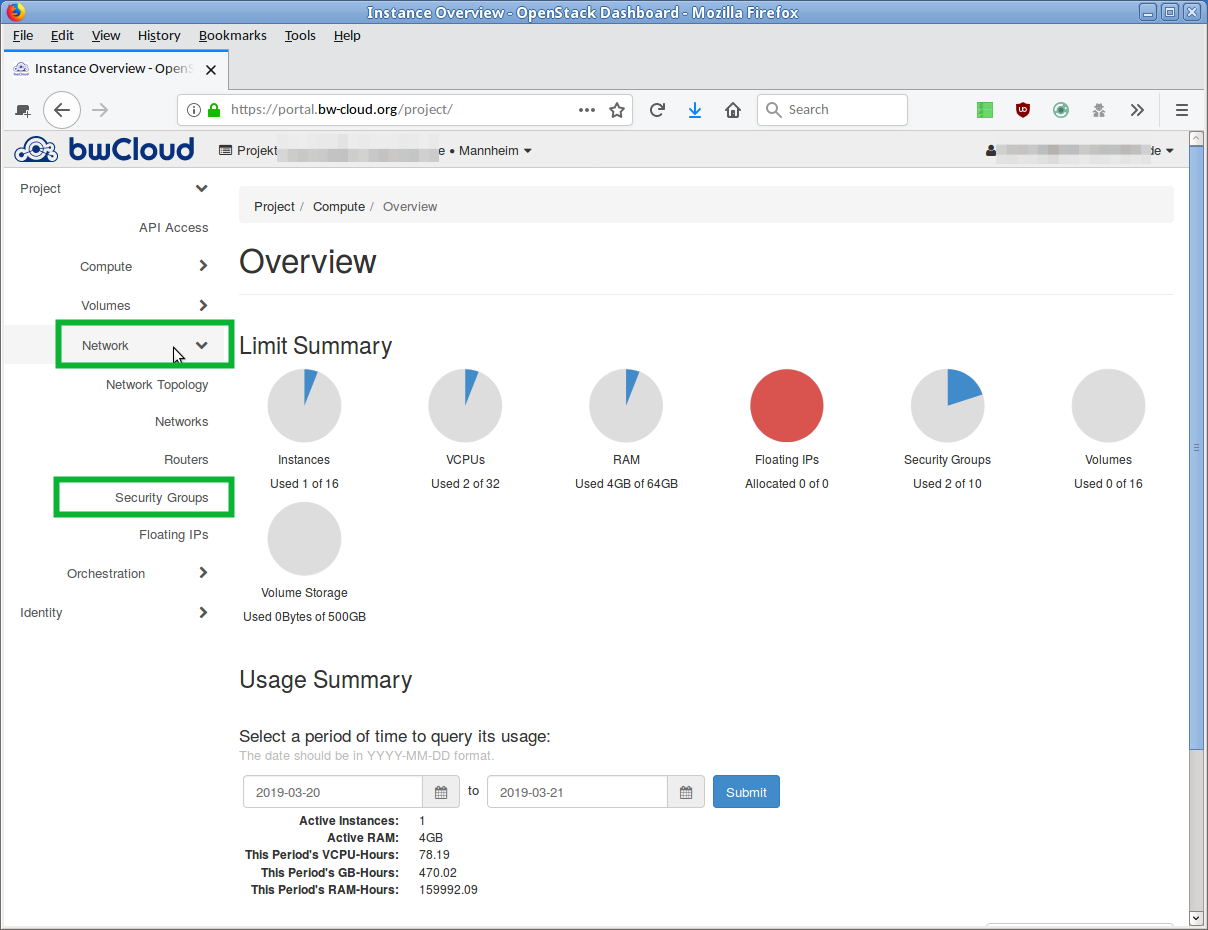
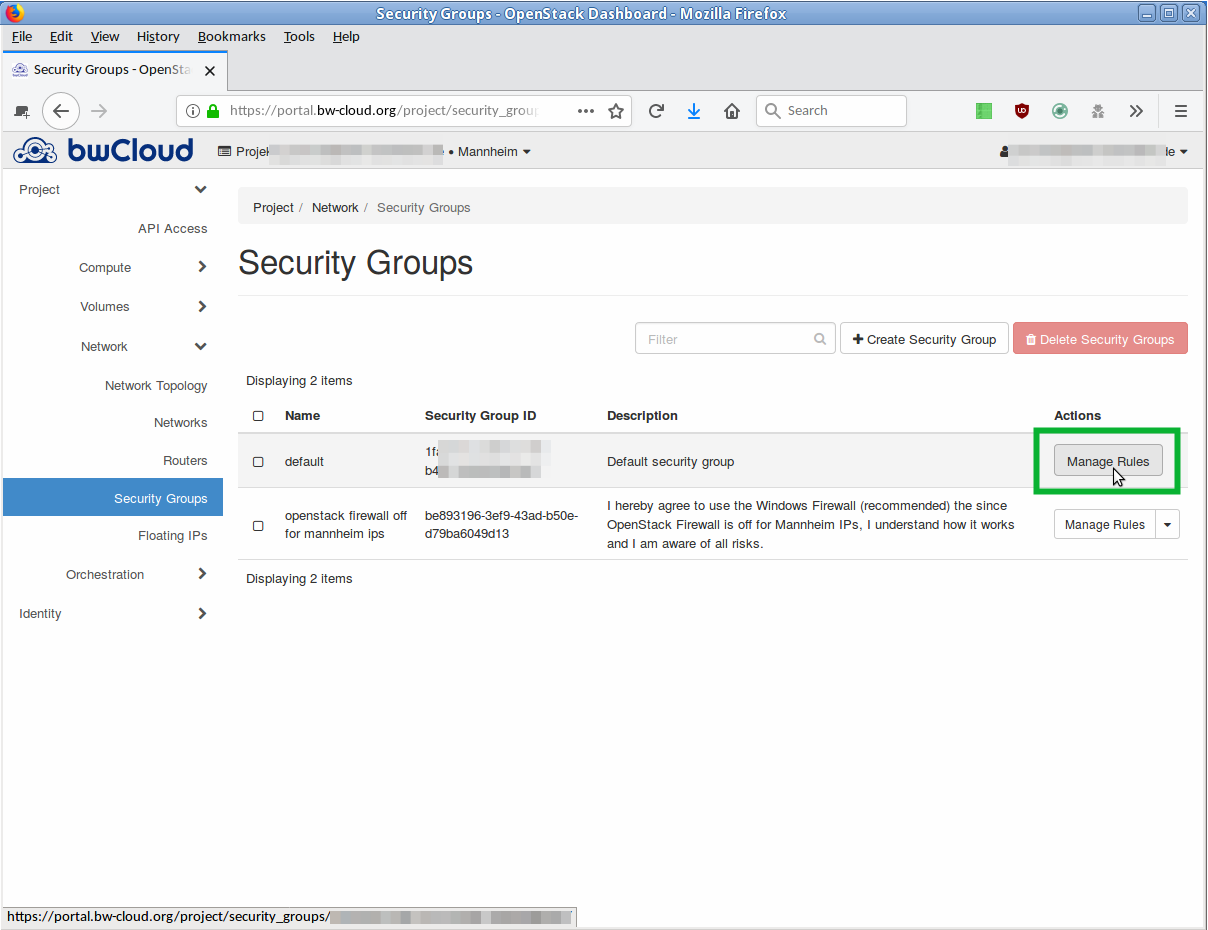
- Click on the left menu on Network and on the sub-item Security Groups. An overview of the currently defined security groups is displayed. The default group bears the name default.
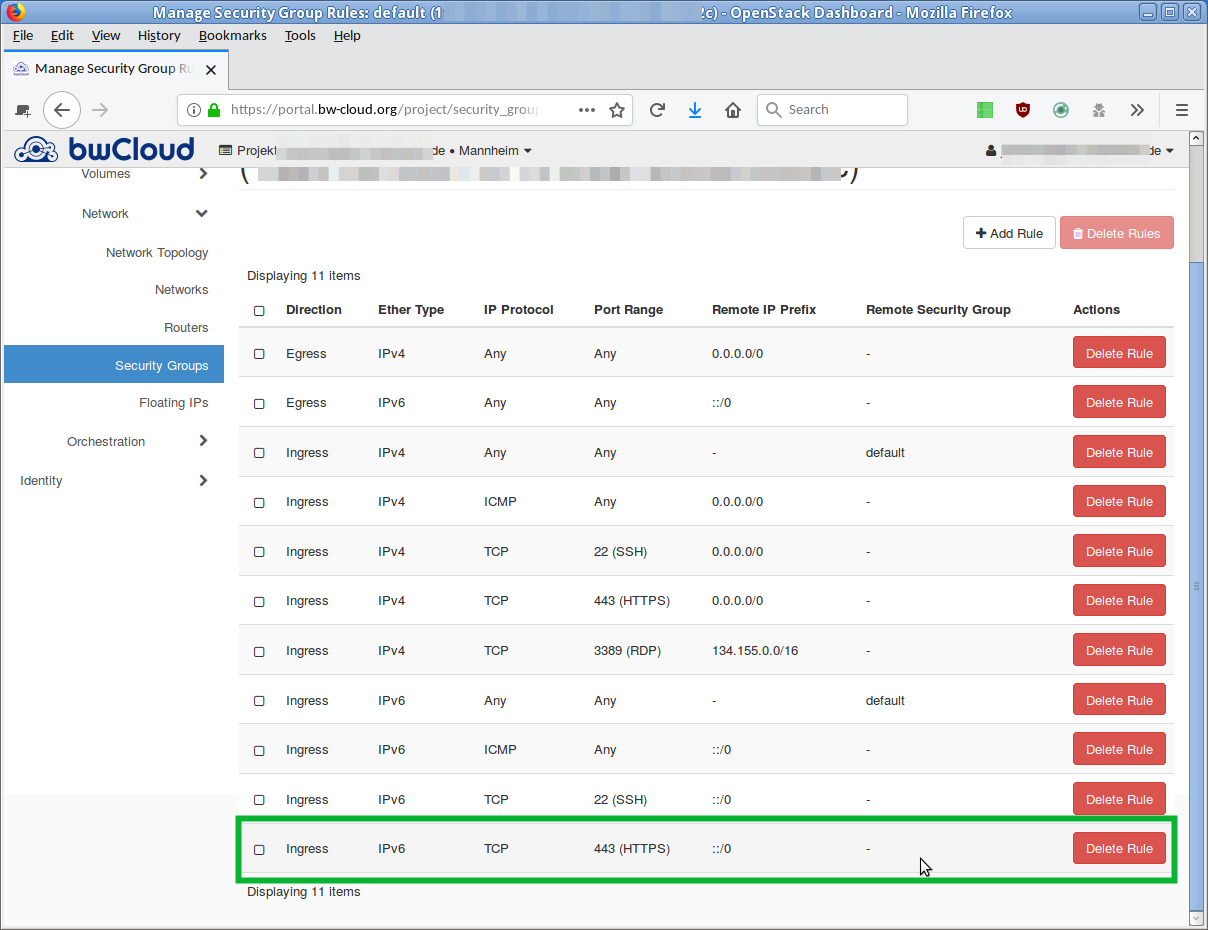
- Click on the button Manage Rules in the corresponding line. An overview of all rules defined for this security group opens.
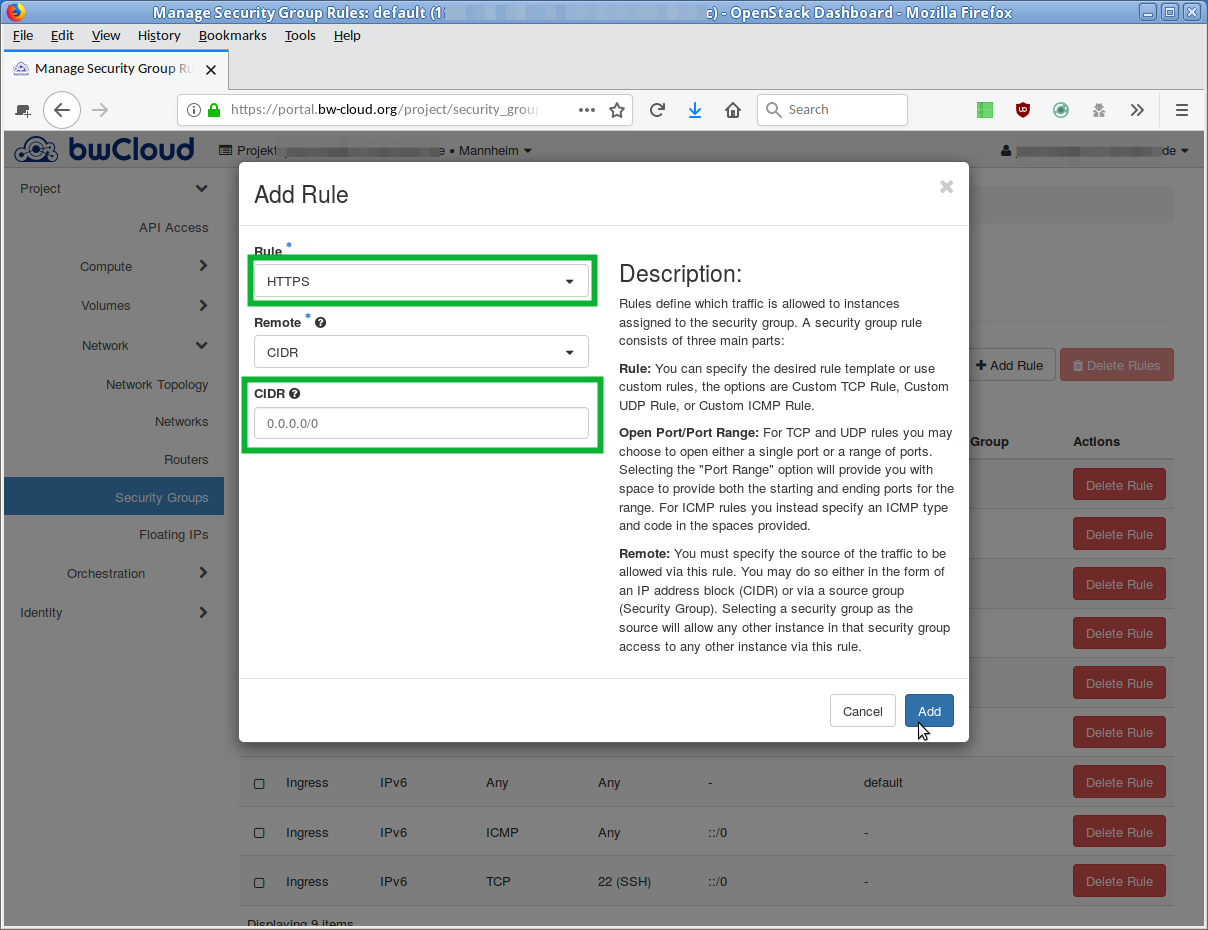
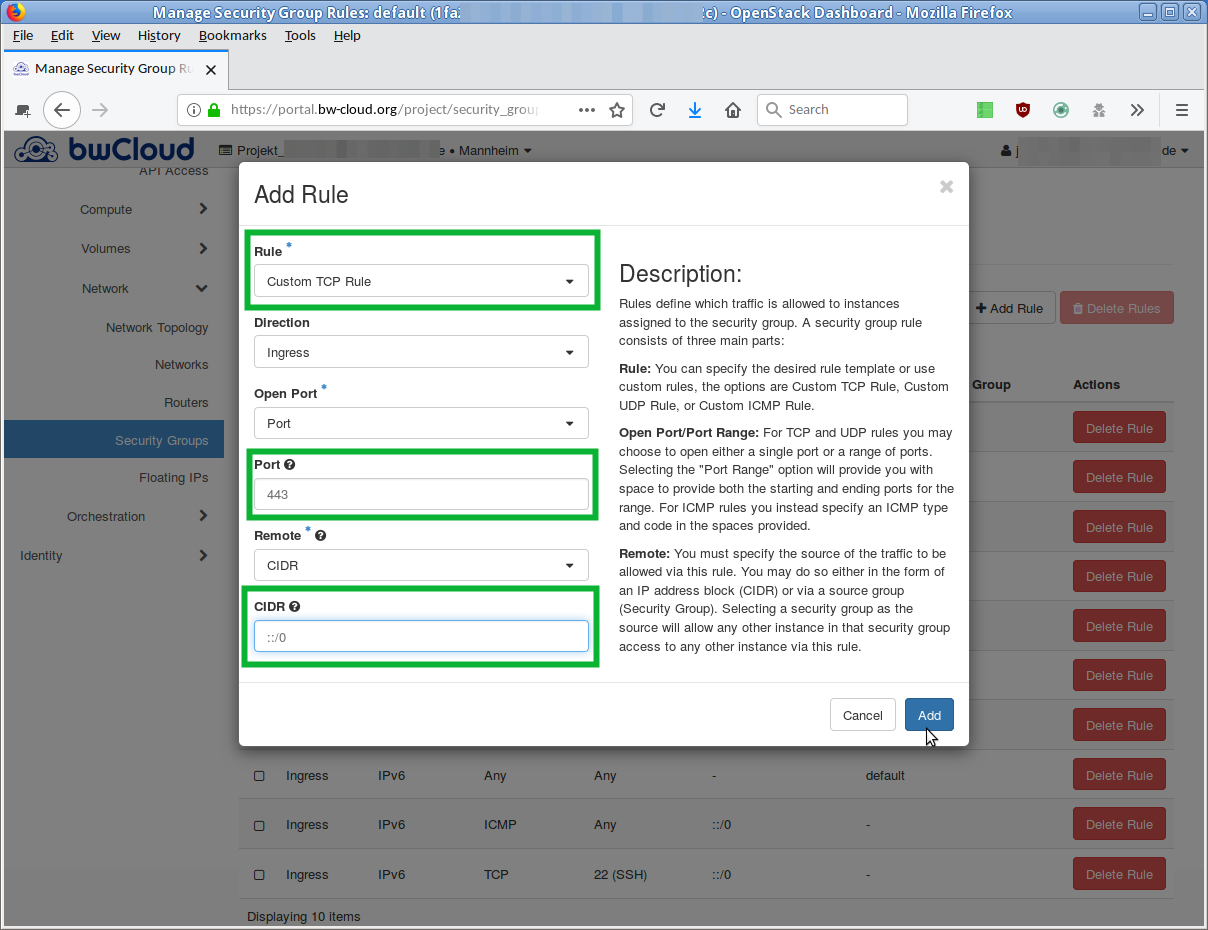
- If you want to add a new rule, click the button Add Rule. A dialog opens in which you can describe the new rule.
-
There are two similar options from the drop-down menu:
-
Select the item Rule the entry
HTTPS . -
Select the Custom TCP Rule item.
Enter port number
443 in the Port field.
-
Select the item Rule the entry
- Your server should not be accessible from anywhere from the outside. The entry in the field "CIDR" restricts the access to a specific network segment. Enter there the IP-addresses that should be allowed.
-
In the field "Direction" you can define the direction:
-
Ingress = Incoming connections -
Egress = Outgoing connections
-
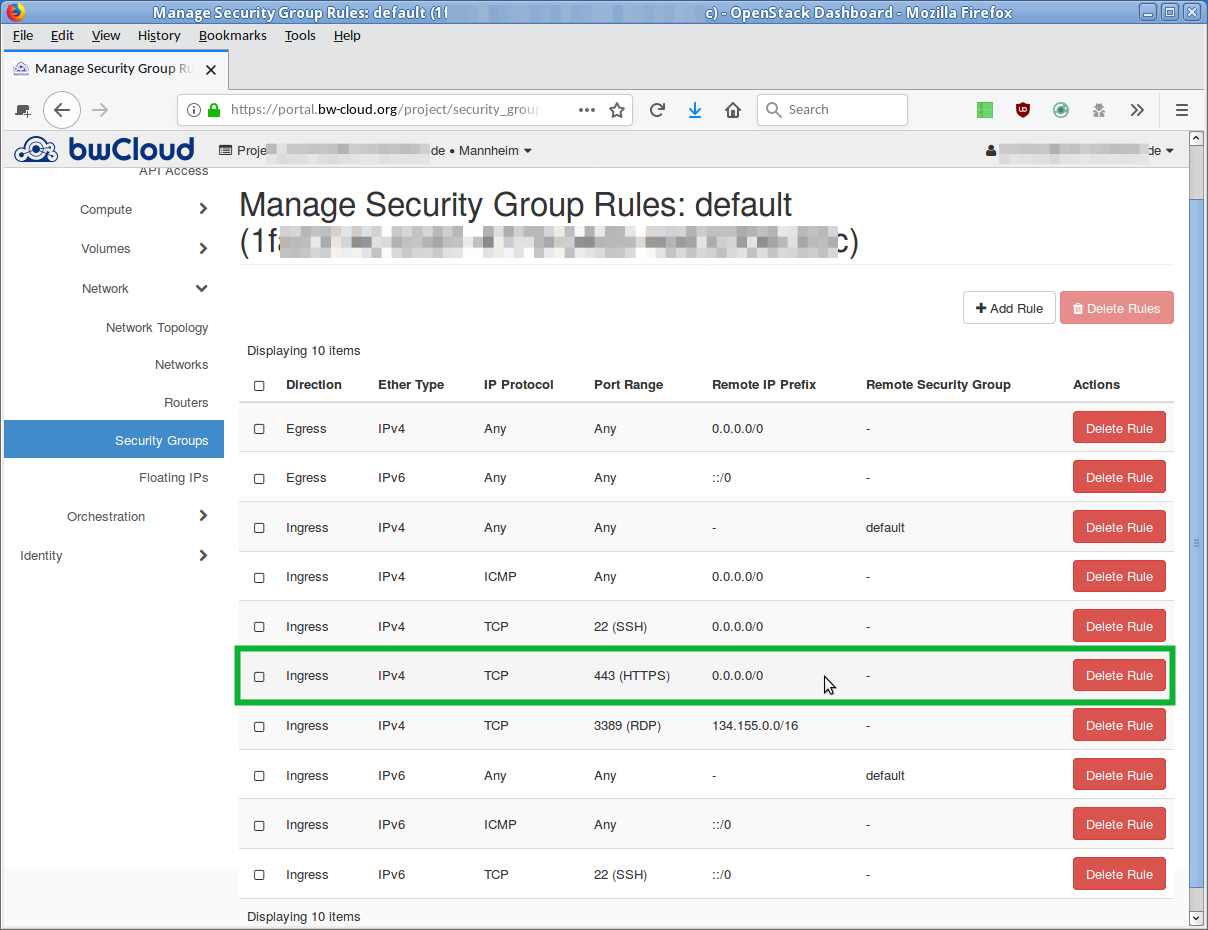
- Click Add, and the new rule is created. The overview is reloaded and the new rule appears in the list.